A step-by-step guide in pictures and words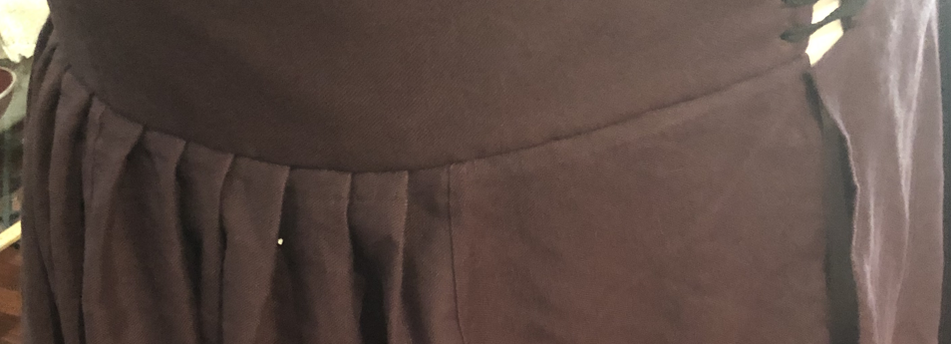 One of the most befuddling parts of kirtle construction, can be attaching the skirt to the bodice. It took me a long time to develop a reliable technique that is easy to use. In this demonstration, I am sewing a middle class Elizabethan kirtle. Step 1: Establish how the garment should be pleated Check with your source material to find out how big the pleats should be for your garment.
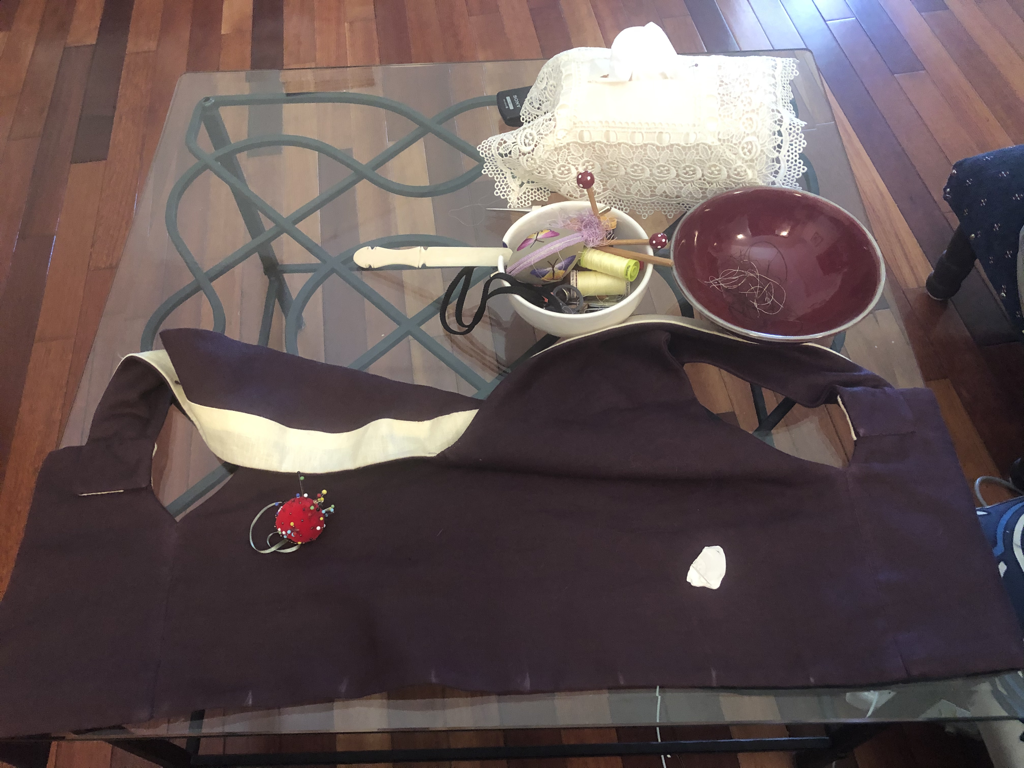
You should always line up the side seam of the skirt to the side seam of the bodice. In fact, I always treat the front and back of the garment separately and apply the technique first to the back and then to the front. Step 2: Assemble your materials
 Step 3: Mark out your bodice and skirt.
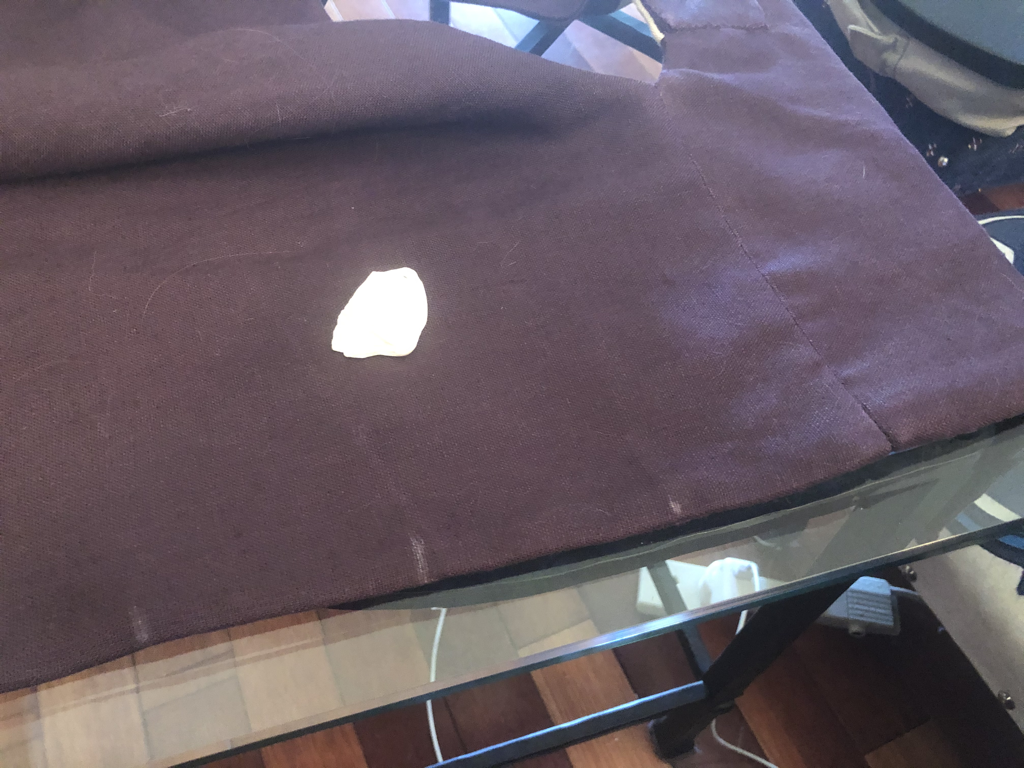 Step 4: Line up your marks
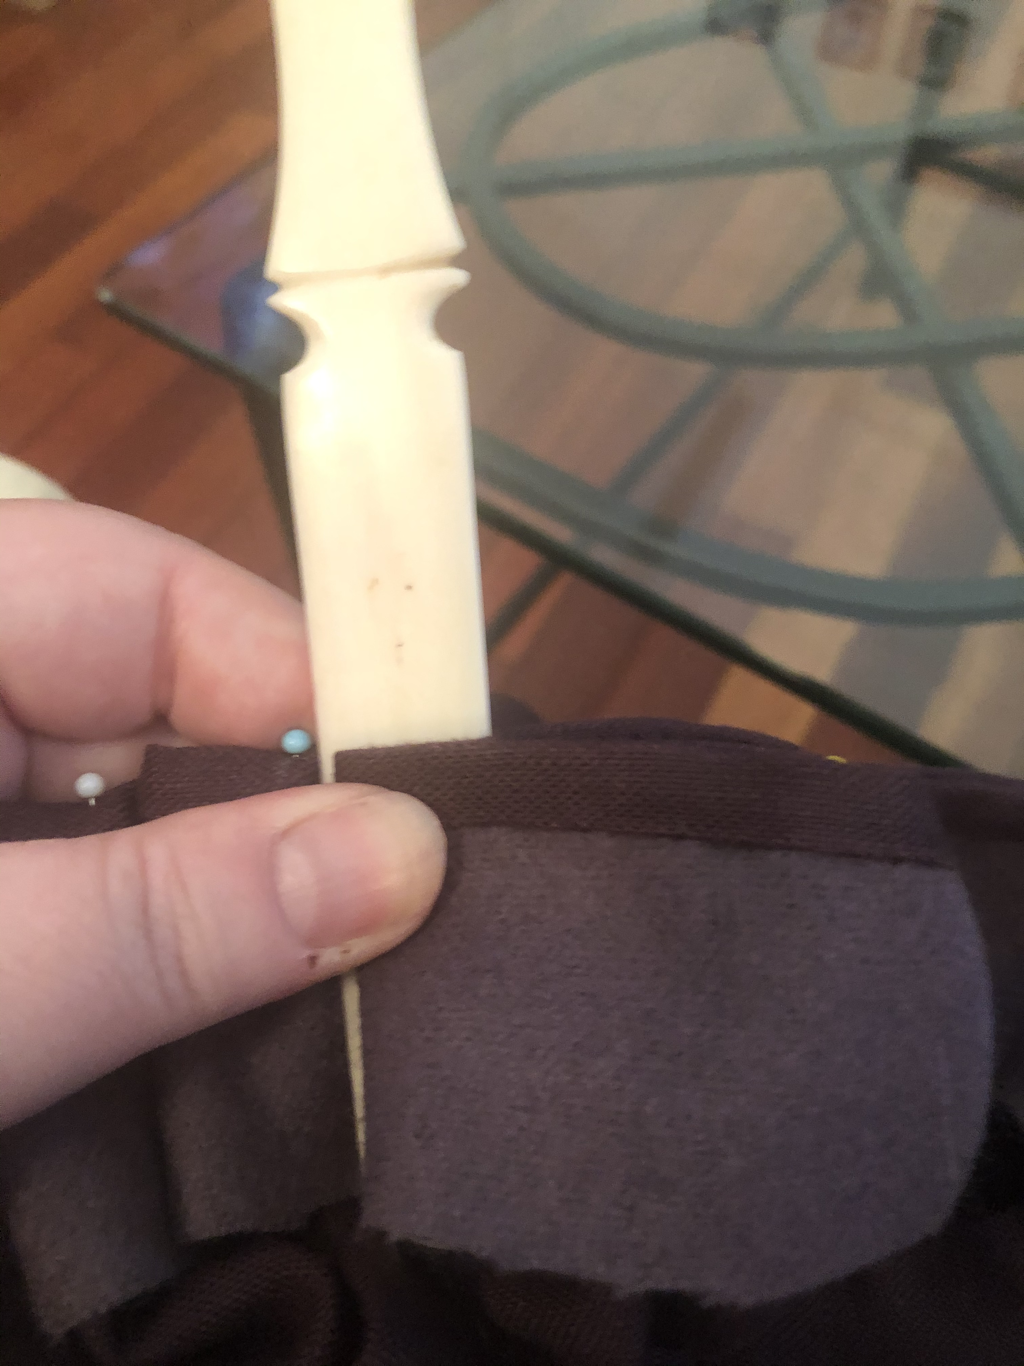
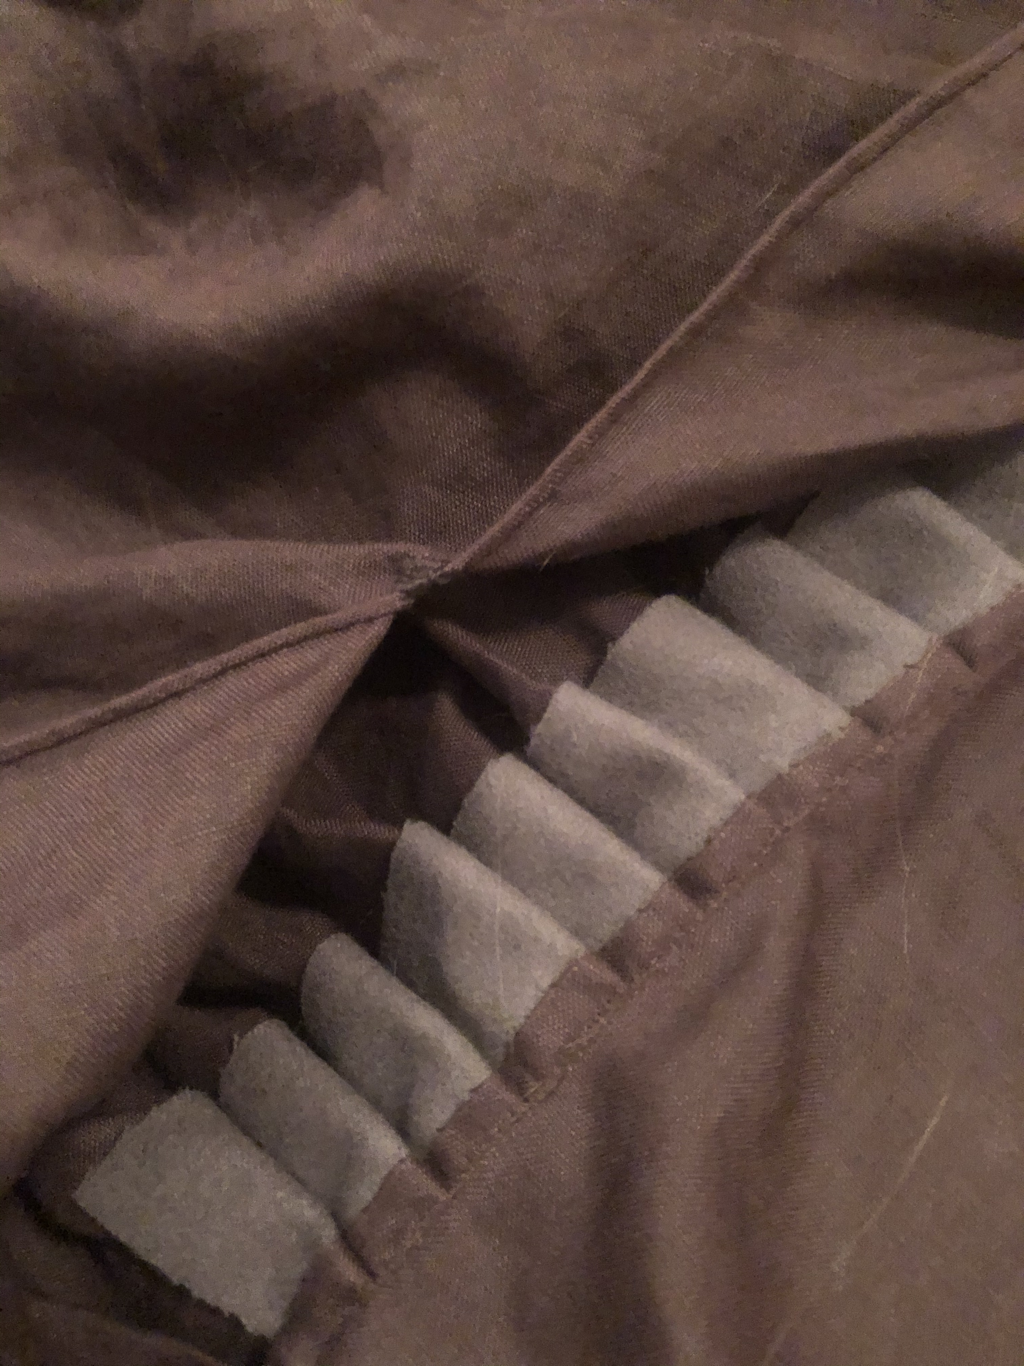
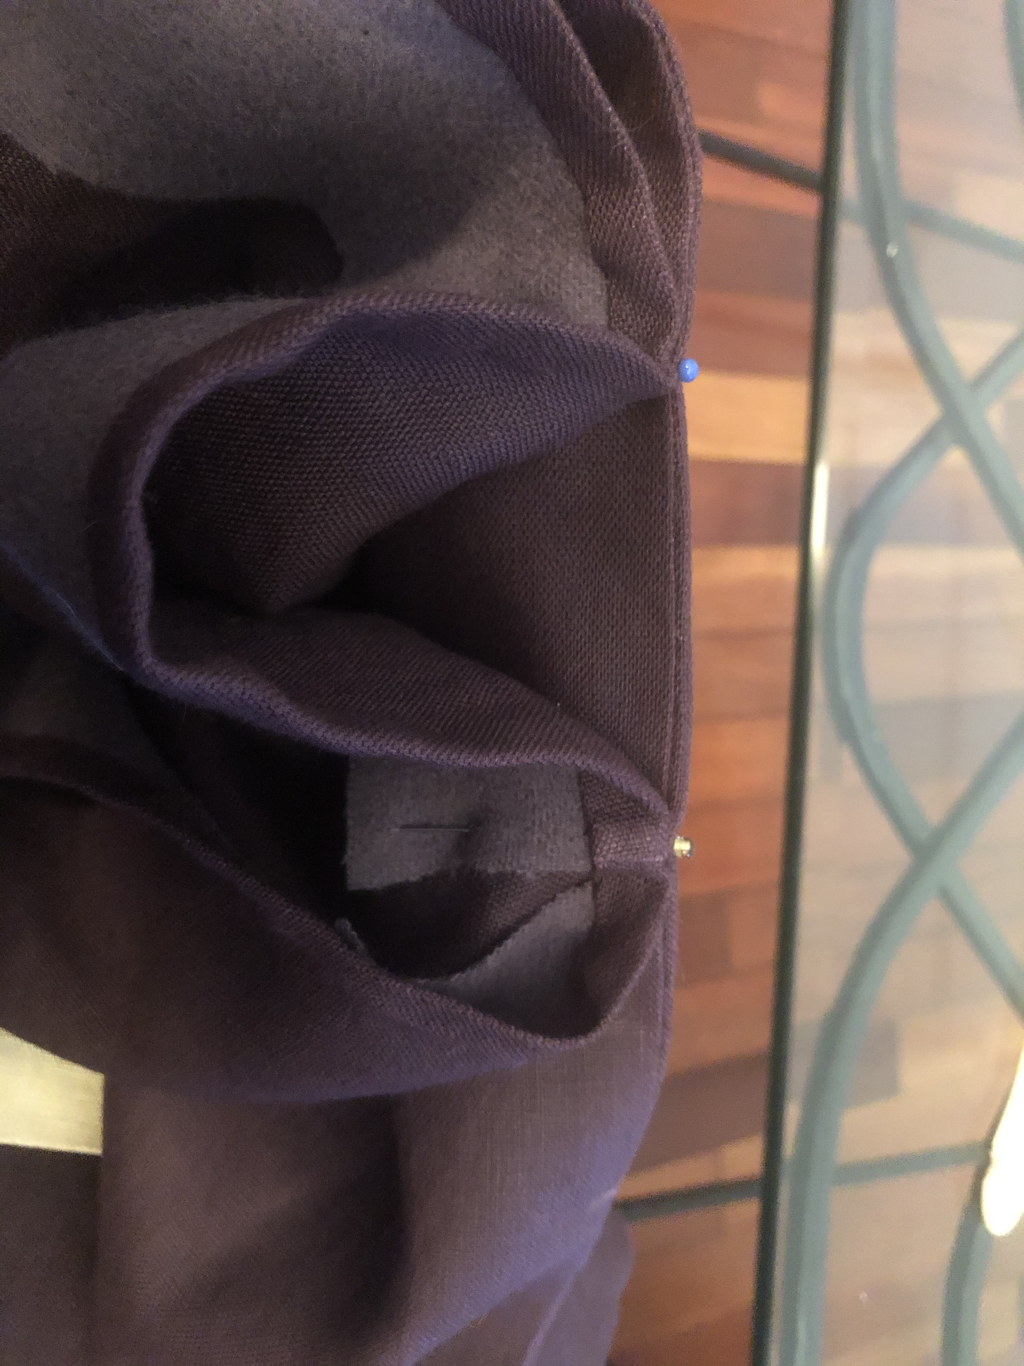 Step 5: Measure your pleats
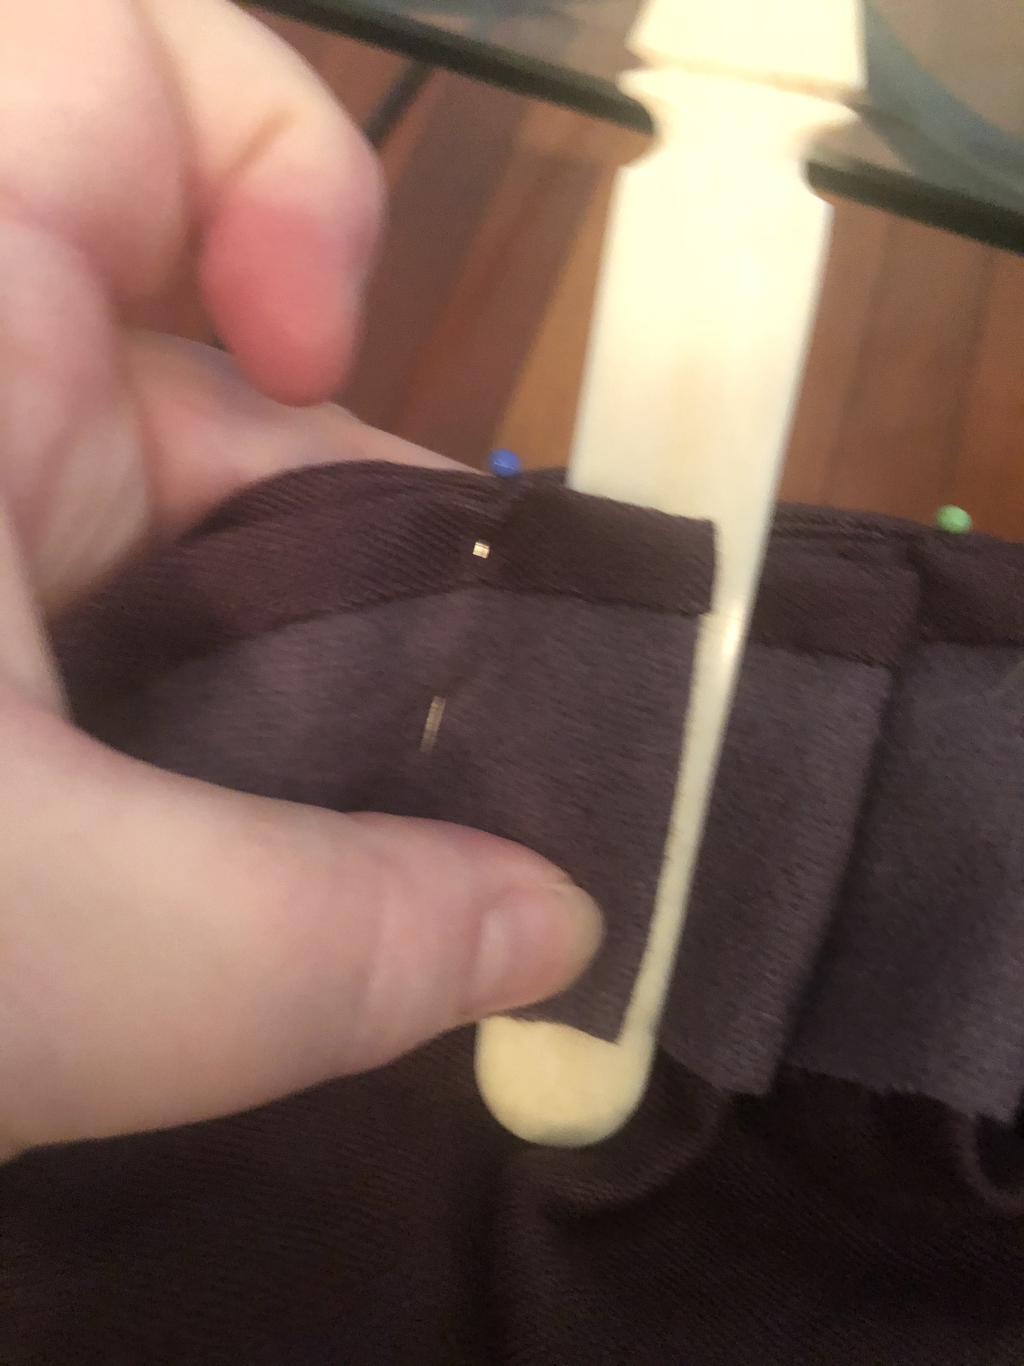
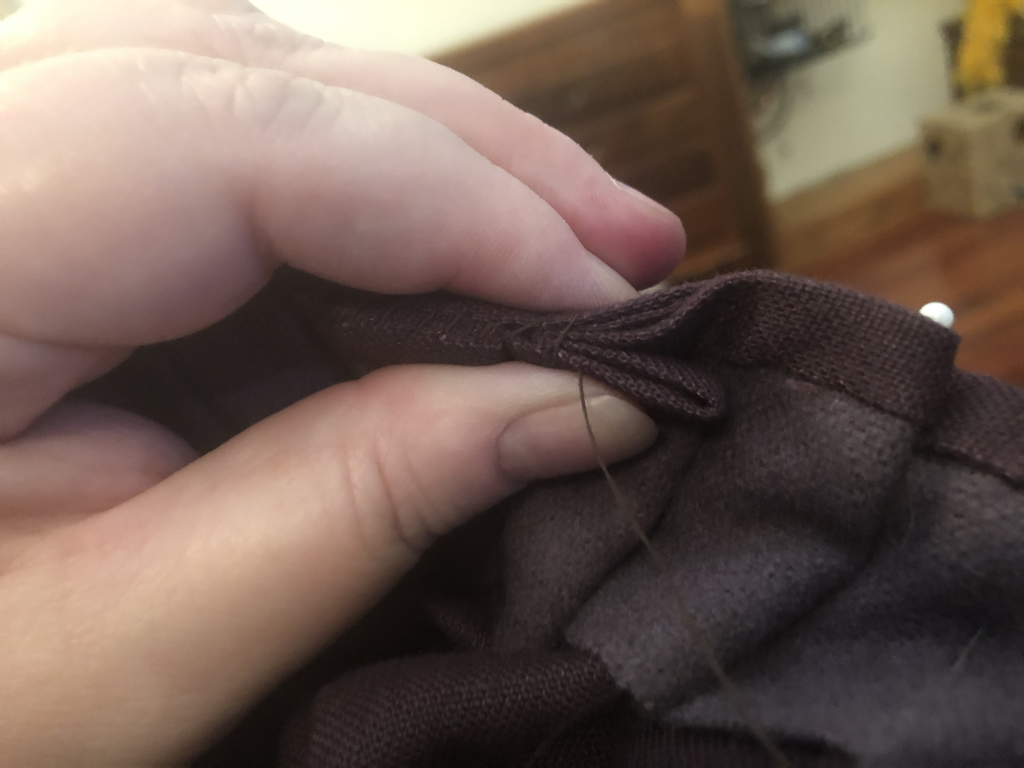
Step 6: Pin your pleats.
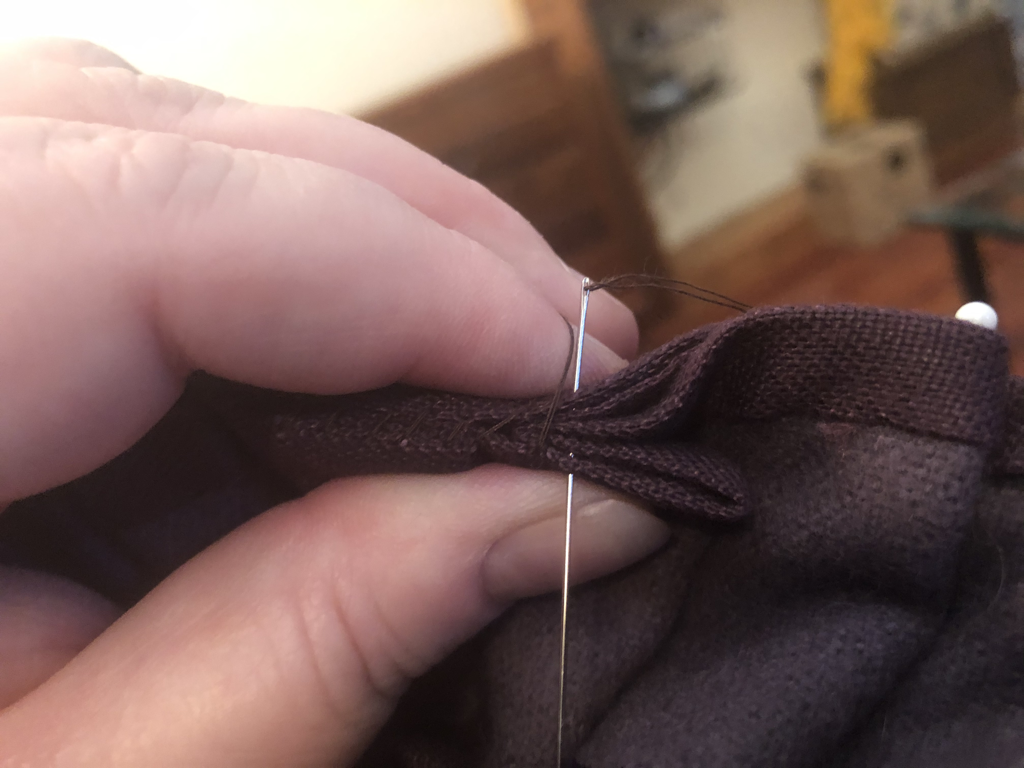
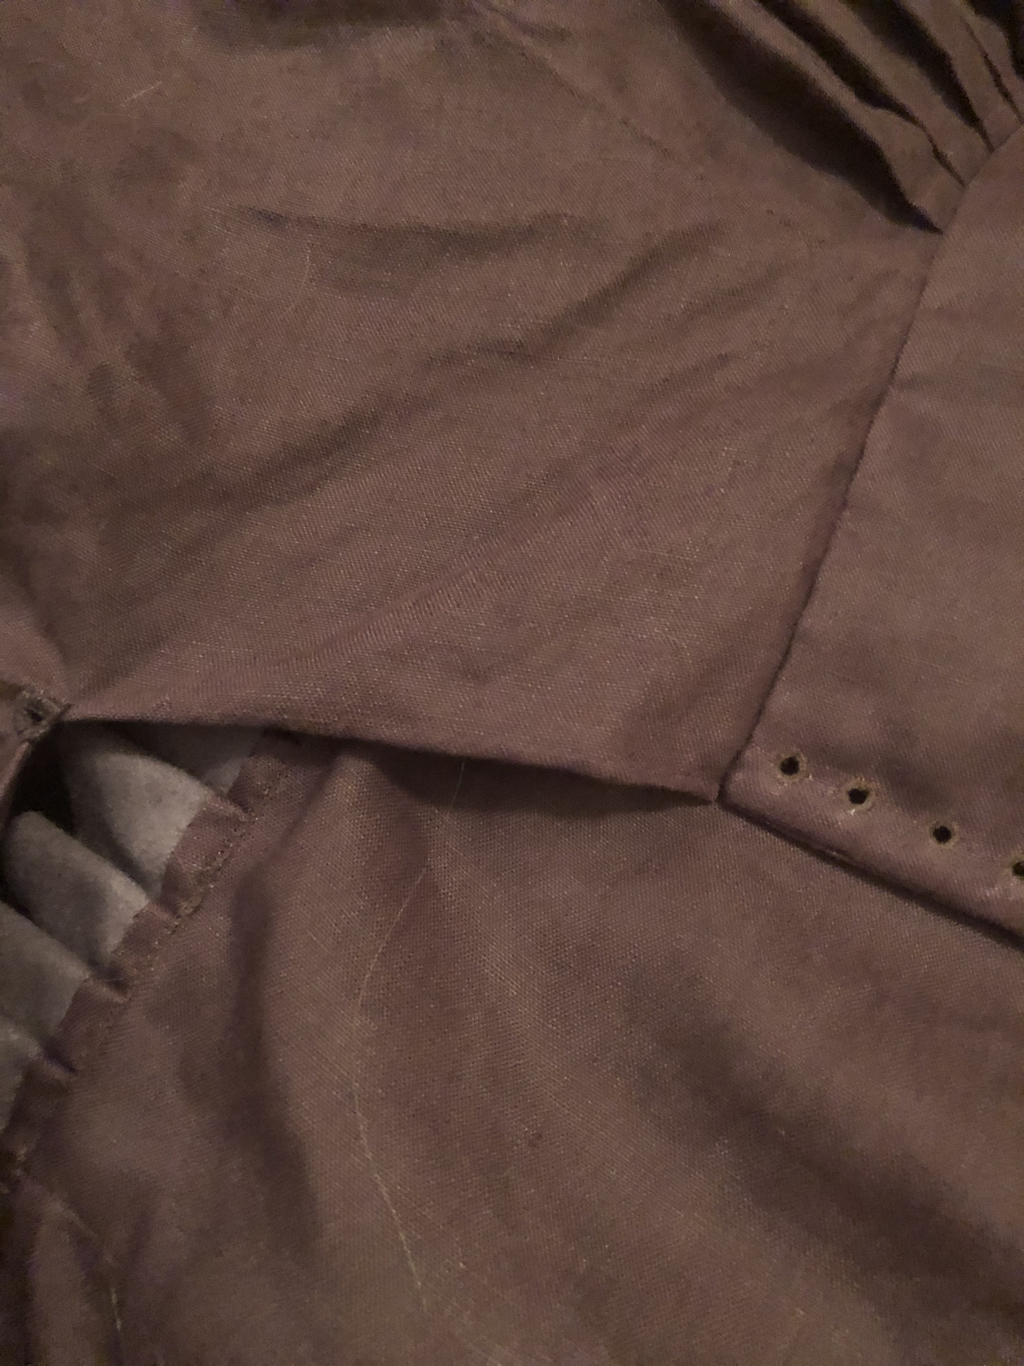
 Step 7: Sew the bodice to the skirt
 Step 8: Finish the garment
 Author: Nicola de Coventre (nee Nicola Boyd). Images and text copyright March 2020.
0 Comments
Ostentation in the 15th Century
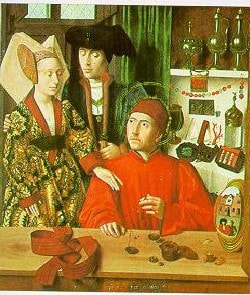
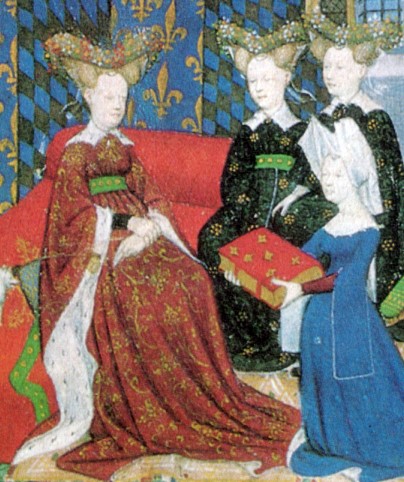
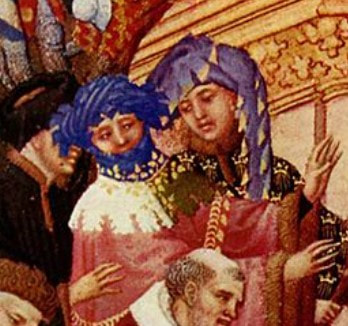
Ostentation in the 15th Century was not restricted to the outrageously ornate Houppelande, it applied to the millinery too. ‘Where too much is barely enough’ as Lady Acacia says, fifteenth century western Europe was home to headwear which ranged from the sublime to the ridiculous – in my opinion, both the chaperon and the headroll straddles both these attributes. The chaperon is basically a donut of fabric covered filling worn on the head. ‘A period source mentions the "hair of dead women," but since that's in fairly short supply these days…A friend recalls seeing a round cork shape in a museum which was made to be rolled up inside a hood to give the stuffed effect, but I do not have any source material on this option.’ (Cynthia Virtue aka Cynthia du Pré Argent, Women's Roll Hats) The chaperon appears to have developed out of dagged hoods with long points at the back. This point, in reality a long tube of fabric, is then wound around the head with the dagging falling over one side. As with many fashions, over time it appears that the headroll or chaperon replaced the hood as headwear in its own right. 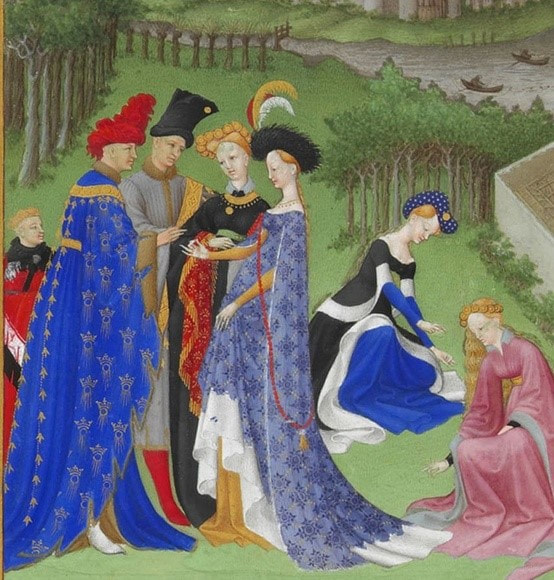 Très Riches Heures du Duc de Berry, 1412-1416 http://www.ibiblio.org/wm/rh/. The chaperon and headroll was worn with a number of garments, most notably the Houppelande. Both men and women wore a variety of headrolls in different shapes, round, dipped at the front, square shaped. It appears more common for men to wear plain and heavily dagged chaperon, but women wore them too. This can be seen in the above detail representing April from the Calender section in the Très Riches Heures du Duc de Berry a medieval book of hours painted approximately 1412-1416
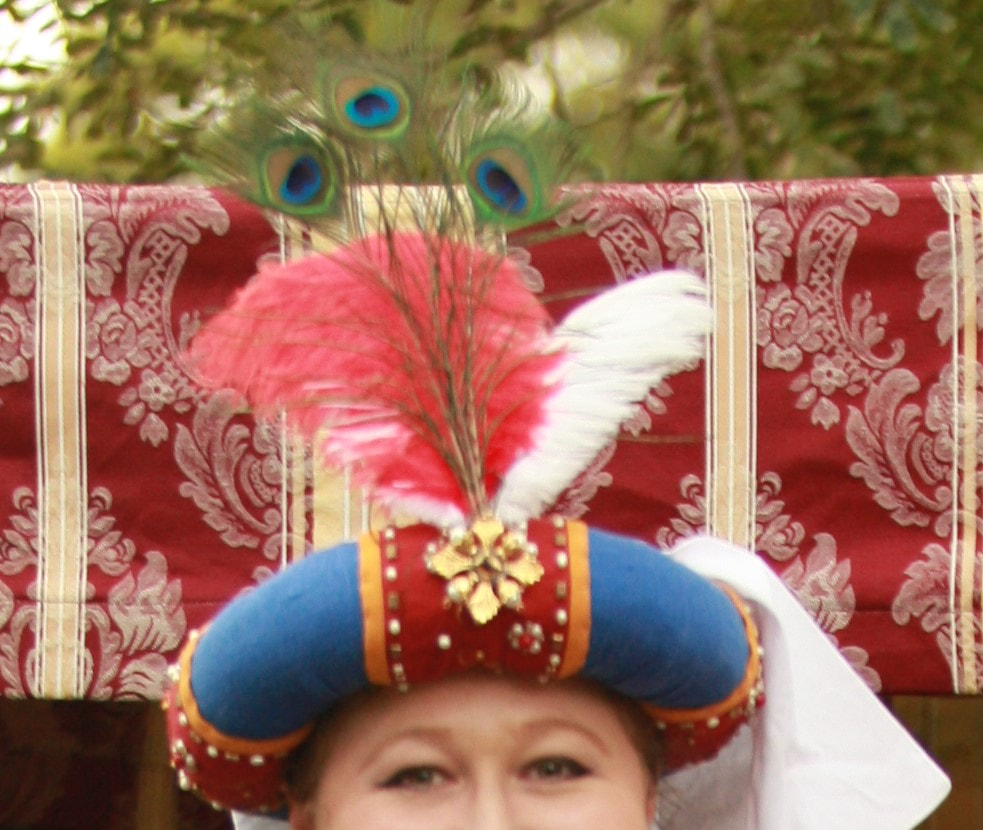
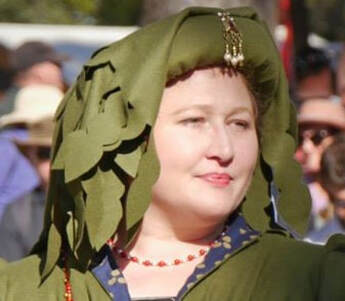
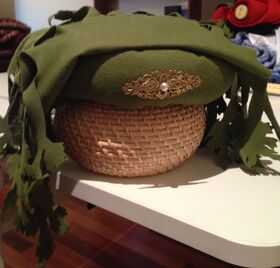
My Inspiration I fell in love with the Houppelande when I was lucky enough to wear it at a fashion parade during the Abbey Medieval Fayre in 2011. Although I have been re-enacting in non-SCA groups for some years, I had never encountered this particular style of medieval garb and was instantly hooked. I decided, with huge amounts of help from Baroness Acacia, to make my own Houppelande. Of course, one is never enough. In March 2015, made a pea-green wool Houppelande with scalloped dagging and decided to make a chaperon to complete the outfit. I had lusted after Baron Drake’s chaperon for some time and he kindly allowed me to examine how he had approached making it. Using this and a variety of secondary sources (paintings from the period) I came up with a pattern. Materials
My Construction Methods The construction for headrolls are surprisingly quick – between 4 to 20 hours depending on the complexity of the dagging.
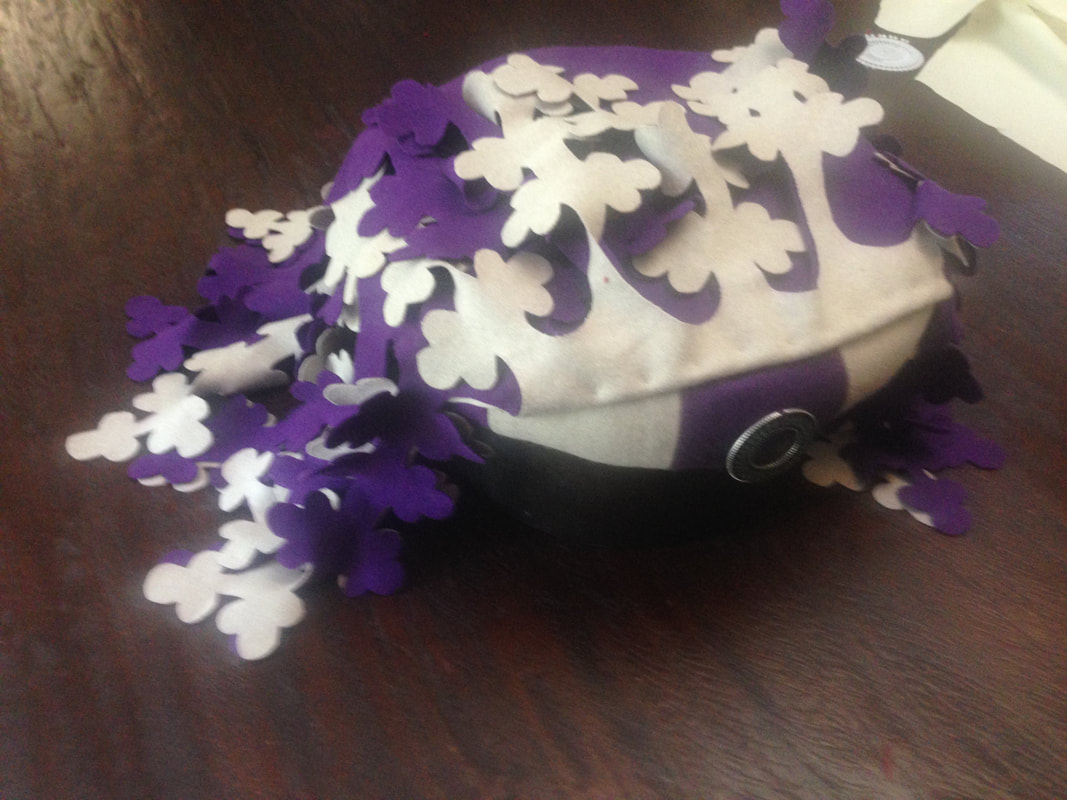
By using fully felled wool for dagging, I did not need to finish any edges and it gave a clean, crisp result. 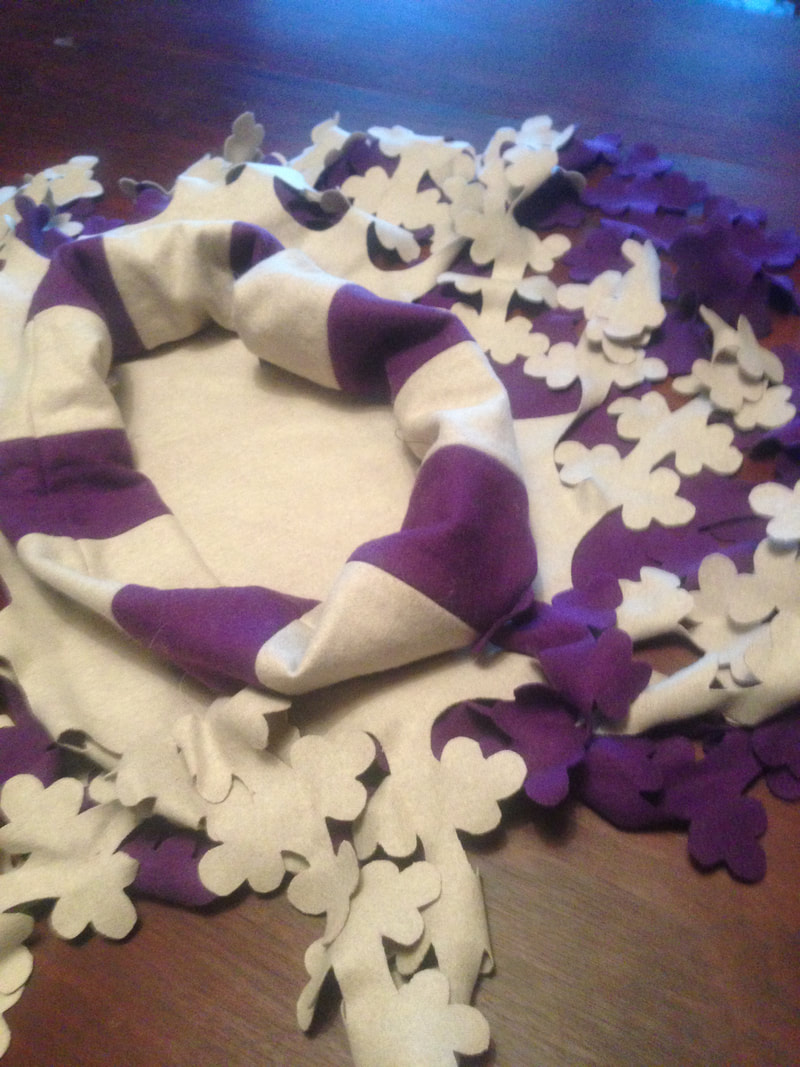 Improvements When I made my original headroll I stuffed it with cloth, but this was far too heavy to wear for more than an hour. This green chaperon is stuffed with polyfill. The purple and cream double dagged headroll used lambswool and I am delighted with the result. It is lighter and softer than polyfil and has given the best look so far. Chaperons 3 and 4 were for other people and completed later in 2015. Both were filled with carded lambs' wool. They were packed more firmly than Chaperon 2. For more firmly shaped headrolls I am still trying to source artist’s Styrofoam of sufficient size for a future project. Stiff foam cut into shape may also be a reasonable substitute for the more historically accurate, but no longer available, cork. Author: Nicola de Coventre (nee Nicola Boyd). Images and text copyright 2020. 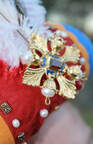 Red and Black French Hood with Gold, Pearl and Garnet Accents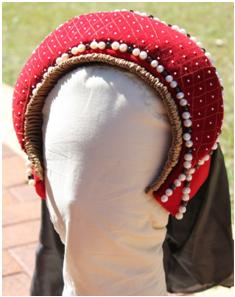 An image of the completed French hood. Context and History of the French Hood The French Hood was fashionable in various parts of western Europe throughout the sixteenth century. Although it, and the way hair was dressed, became more revealing over time, essentially, the hood remained fairly static and was worn with all kinds of court dress. ‘It was usual to mix colours in one outfit, usually with two predominating – white/silver, red/black, white/gold were popular combinations. There was almost always some black either as a dominant colour or as a foil. (Cassin-Scott and Green 1975, p.17) Rich, heavy fabrics – velvet, brocade, damask – were delighted in and ornamented with embroidery, spangles and jewels. (Cassin-Scott and Green 1975, p. 15) Anne Boleyn is credited with introducing the French Hood into England. During her stay at the French court she adopted the continental style, and continued to wear it upon her return to England. (Leed n.d.) ‘By 1550 an English lady would still cover her head with a cap, of which fashion placed a French hood trimmed round the front with a richly ornamented band, a billiment, while a fall of black velvet covered the back of her head. But the whole thing had slipped back to show the front hair with its central parting. (Cassin-Scott and Green 1975, p.31) For the fashionable woman, the primary form of headgear was the hood…It usually consisted of several separate elements. There was always a white linen cap, which formed the foundation and could be washed. This was partially or entirely covered by the other parts, such as the frontlet, blilliments, lappets and veil. When pinned together, these components formed the full headdress. The French hood had a rounded top… The under cap was set back on the head… It fitted closely to the head, with a brim curving forward to cover the ears. The brim was sometimes edged with a pleated strip of gauzy silk. A decorative band, the upper billiment, was then pinned to the cap, at the point where the underlying hair crossed over the head, adding height. This could be plain velet, taffeta or satin, and might be jewelled or consist entirely of goldsmith’s work… …The under cap was always white, the veil always black, frontlets were usually black, and the lappets and billiments were limited to black, red, white or gold.” (Mikhaila and Malcolm-Davies 2006, pp. 28-29)
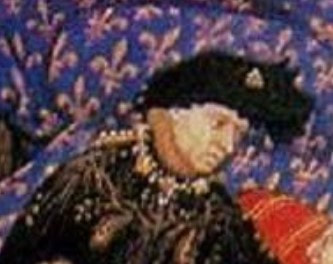
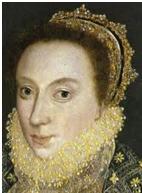
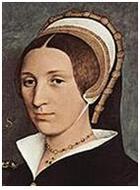
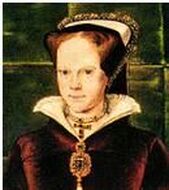
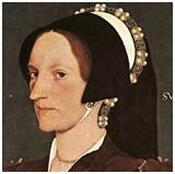
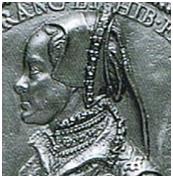
Further details found in two other books. Queen Elizabeth's Wardrobe Unlock'd in Plate 238 ‘Portrait of Unknown Lady’, by an unknown Flemish master, c. 1545-55, Metropolital Museum of Art, New York (Black and White) shows pearls in geometric lattice pattern on upper billiment and has what appears to be a pleated crepine. (Arnold 1988, p. 151) In Dress at the Court of King Henry VIII there are the following examples of French hoods in paintings of the period. 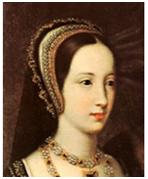 Figure 7 P1 IIIA Charles Brandon and Mary Tudor, attributed to Jan van Mabuse, Woburn Abbey. This shows Mary Tudor with a French hood of white, gold, pearl embellishment and black veil. No crepine, however, there appears to be a line of large purl thread along the front edge of the lower billiment. Large pearls show along the lower edge of the upper billiment and sapphire set badges along the upper billiment. A detail of this portrait is shown above. 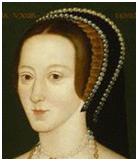 Figure 8 P1 Vc Anne Boleyn, unknown artist, c1530, National Portrait Gallery, London (NPG 668). French hood appears to be black on gold set with pearls along the upper and lower billiment (past the ears). In the detail above of the portrait, there appears to be a fine gold pleated crepine – it appears it may have been wired to keep the shape (although that may have been the artist’s interpretation) 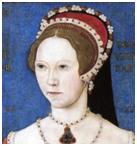 Figure 9 P1 VIIA Mary Tudor, attributed to Master John, 1544, Mational Portrait Gallery, London (NPG 428) – detail seen above. Again there appears to be a pleated or possibly gathered crepine. There is a red upper billiment and white lower billiment with pearl and gold decoration. (Hayward 2007) All of the above examples appear to have fairly flat upper billiments (apart from the final picture of Mary Tudor) which are almost a parallel horizontal to the head. Constructing the Hood – Sources, issues and compromises I used Maud la Leitiere’s ‘How to make a French Hood’ ((alias) la Leitiere 2011), Drea Leed’s (Leed n.d.) and the Tudor Tailor as resources to guide my construction of this headwear. The class handout provided by la Leitiere was my primary construction source as it provided clear instructions and a complete pattern. The materials used are; red velvet, black silk taffeta, gold silk, buckram and millinery wire for stiffening, felt for padding, cotton hand-sewing thread; gold purl thread, beading wire, freshwater cultured pearls (as I could not afford to use natural pearls) and real garnet beads for decoration. There are two key modifications to traditional design that I made in concession to the higher temperatures in which the hood will be worn.
To provide a good finish in the hood construction, I used a period ladder stitch (de Treves and Lorraine 2007) which helps hide the stitching at the seams and if completed finely, provides for sturdy construction. Everything bar the inside seam of the veil (a saddle stitched French hem) has been hand-sewn. I could have hand sewn this too, but the material frays very easily and machine sewing this was the best way to assure the seam would not pull out. I have chosen to incline the upper billiment on a fairly flat angle. In the above portraits, almost all of the upper billaments are almost flat in relation to the lower billiment. Many French hoods I have seen in period dramas and in re-enactment construction have almost upright billiments and certainly from a modern aesthetic this is pleasing, but my preference was to try to match the angle I had most commonly seen in portraits of the period. 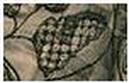 The above detail from Elizabeth I (painted in 1590 by an unknown artist) (Hogg 2010, p. 11) shows that couched lattice stitch was used in the period. I have already noted that purl is evident in Figure 7, so by this reasoning, the lattice worked purl used on the upper billiment of my French hood is justified. This embroidery is not as straight as I would like it and in future I would likely use fine gold passing for similar projects as it would likely be more durable and provide a better finish.
The seed pearls used were each attached by threading them on to a double thickness of sewing thread, rethreading the needle and stitching to the next position. The weight of the finished hood, and snug fit, suggests that with tape bound plaits it will stay on my head firmly without the addition of a comb inside. Overall, this project took considerably more time than I would have anticipated – approximately 70 hours, mainly due to the layers and the time it took to pin each layer into place before sewing, the seed pearls and other decorations being attached. This is my first attempt at beading. However, I very much enjoyed my first attempt at millinery. Citations (alias) la Leitiere, M. (2011). How to make a French Hood. Arts and Sciences. Annerley, Queensland. Arnold, J., Ed. (1988). Queen Elizabeth's Wardrobe Unlock'd. Leeds, Maney. Cassin-Scott, J. and R. M. Green (1975). Costume and Fashion in Colour 1550-1760. Dorset, Blandford Press Ltd. da Trezzo, J. (c. 1555). 'Mary Tudor and Phillip of Spain (medal)', Available at: http://www.kimiko1.com/research-16th/FrenchHood/1550/MaryPhillipMedalHead.html. Last accessed: 20/08/2011. de Treves, O. J. and C. Lorraine (2007). 'Embroidery Stitches found in Period', Available at: http://casbal.100webspace.net/classes/Embroidery_Stitches_found_in_Period.pdf. Last accessed: 27/10/2008. Eworth, H. (1554). 'Mary I', Available at: http://en.wikipedia.org/wiki/Hans_Eworth. Last accessed: 20/08/2011. Gower, G. (1573). Mary Denton aged fifteen. New York, York City Art Gallery. Hans_Holbein_the_Younger (c. 1540). 'Portrait of Margaret Wyatt, Lady Lee', Available at: http://www.kimiko1.com/research-16th/FrenchHood/1540/MargaretWyatt.html. Last accessed: 20/08/2011. Hans_Holbein_the_Younger; (c. 1540). 'Elizabeth Seymour wearing a French hood.' Available at: http://en.wikipedia.org/wiki/French_hood. Last accessed: 20/08/2011. Hayward, M., Ed. (2007). Dress at the Court of King Henry VIII. Leeds, Maney Publishing. Hogg, B. (2010). Blackwork (Royal School of Needlework Essential Stitch Guides). Kent, Search Press Ltd. Leed, D. (n.d.). 'Constructing a French Hood', Elizabethan Costuming Page, Available at: http://www.elizabethancostume.net/headwear/fhoodmake.html. Last accessed: 10/08/2011. Leed, D. (n.d.). 'French Hoods: Their History & Development', Elizabethan Costume Page, Available at: http://www.elizabethancostume.net/headwear/frenchhood.html. Last accessed: 10/08/2011. Mikhaila, N. and J. Malcolm-Davies (2006). The Tudor Tailor: Reconstructing sixteenth-century dress. London, Batsford. Peake, R. (1582). 'Anne Knollys. Oil on Panel. Inscribed: "', Available at: http://en.wikipedia.org/wiki/File:Anne_Knollys)_by_Robert_Peake.jpg. Last accessed: 10/08/2011. Author: Nicola de Coventre (nee Nicola Boyd). Images and text copyright September 2011. |