Articulate Tree
  • Home
  • Food
  • Embroidery
  • Historical Clothing
  • Fencing
  • Home
  • Food
  • Embroidery
  • Historical Clothing
  • Fencing

Articulate Food

French macarons

9/5/2020

0 Comments


Gluten Free. Modern.

Picture
French macarons are considered very difficult to do well. That is not really true. The main issue is that you need to do three or four batches to work out what you do right or wrong and how they work with your oven. You might succeed the first time, but you should pay close attention and take notes (and photos) before putting your biscuits into the oven, including noting:
  • the exact size of the biscuits 
  • the batter and how responsive/mixed it is
  • how shapely the biscuits are once the trays have been slapped on the surface to level
  • humidity of the day (too humid, they won't work)
The main thing that I have always been warned about for meringues is not to stir or fold very much so as to keep the air in the egg white, but I found that I did much more folding of this mixture than I expected. In fact, the first and third batters were not as folded, and did not come out as well (particularly the first batch).

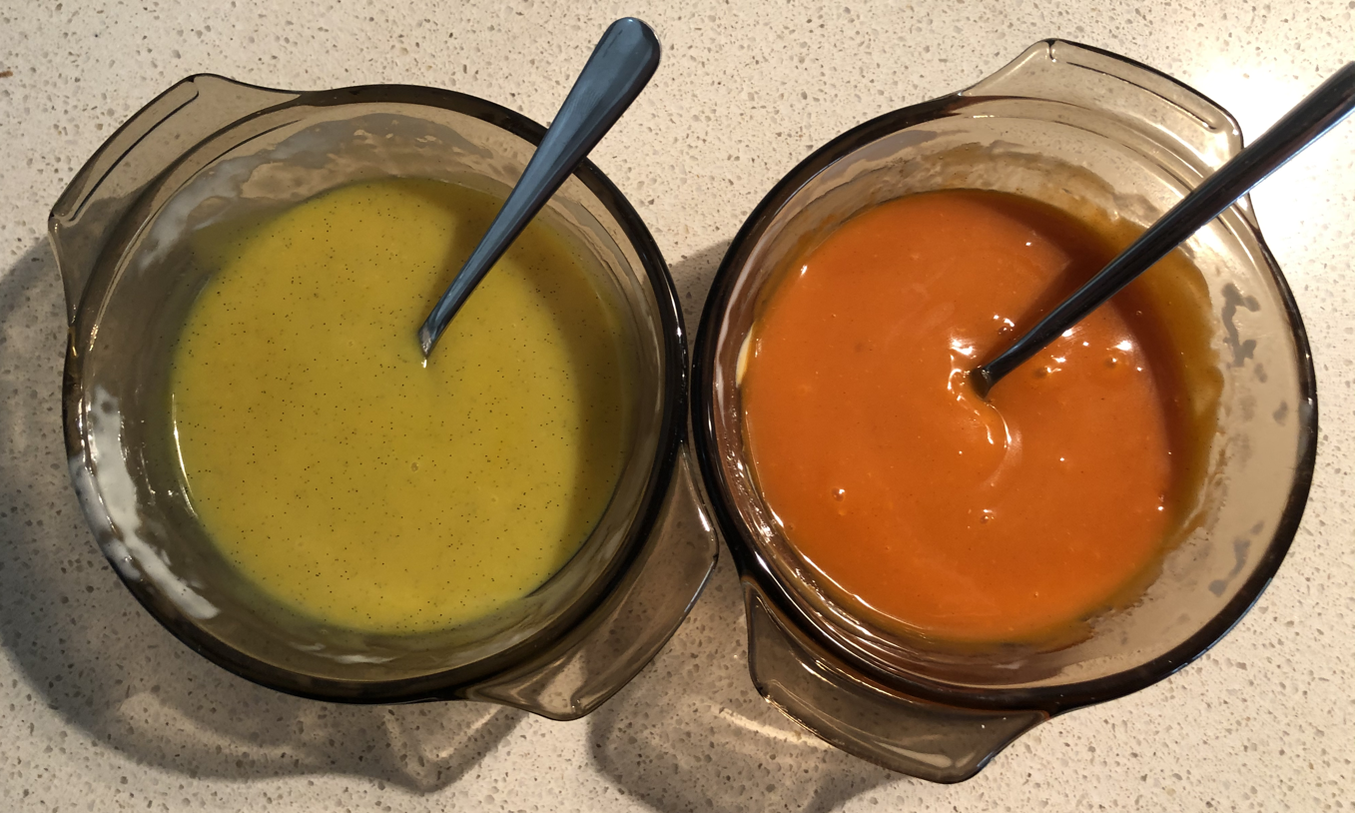
Before I tried any particular recipe, I did my research. Looking at a number of sites, including:
  • Preppy Kitchen
  • Cake Crumbs
  • Sally's Baking Addiction
  • Sweet and Savory
  • Let the Baking Begin
  • Taste
I eventually adapted The Best French Macaron Recipe from Indulge with Mimi. The reason I chose this is because it had a lot of detail.​
Picture
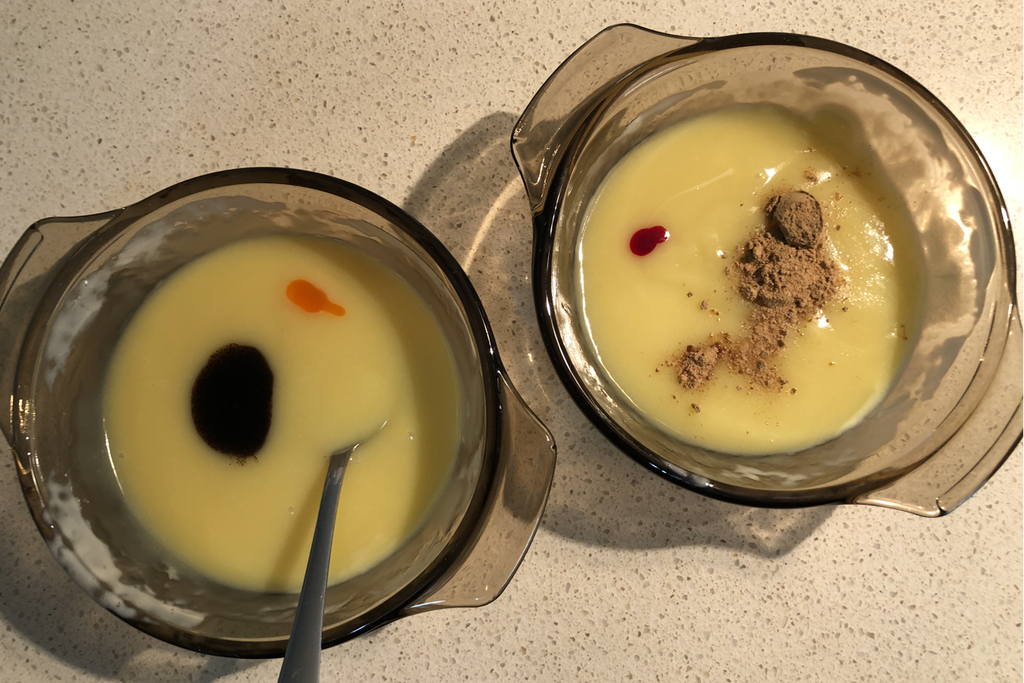
Biscuit Filling
You can make the filling anytime. Be adventurous. Lemon butter. Ginger or glacier ginger. Vanilla buttercream. Ganache. As long as it is smooth and will set nicely, you can try your hand at anything.

I made two white chocolate ganaches for my macarons, one vanilla flavour and one ginger flavour. Ganache is roughly 1 part cream to 2 parts chocolate.

Ingredients
  • 90g of white chocolate (I use Poppy’s Chocolate which is Gluten Free)
  • 40 mils of lactose free cream (or 2 Australian tablespoons) suitable for whipping  
  • A couple of drops of gel colour
  • 4 teaspoons of flavour (liquid or dry)
Method
  1. Heat the cream in the microwave until hot but not boiling. Put in the chocolate and mostly melt in the microwave.
  2. Pull out the chocolate/cream while the chocolate is still partially formed and stir until no lumps of chocolate are still showing.
  3. Stir in the colour and flavour
  4. Refrigerate (lasts for at least as long as the expiration date on your cream).
Picture
Meringue Biscuit

Preparation
Day before you cook. Wash your jar or glass in soapy water, rinse thoroughly, spray with white vinegar and dry with kitchen towel. Separate out egg whites from 2-3 eggs and measure out 50g of egg white into your clean glass. Cover with plastic wrap, use a fork to put a few holes in the top and refrigerate for 24 hours (can be up to 72).
An hour before you wish to cook, take the egg whites out of the fridge. Wash all your bowls and utensils, dry, spray with white vinegar and dry with paper towel. This is absolutely critical.
On the shiny side of your baking/parchment paper, draw a circle 3cm in diameter. Allow 2cm between circles on your parchment paper. Make up enough parchment paper for three trays. You will be putting the baking paper shiny side down into the baking trays.
Set up piping bag and place in a tall glass. This will help you when filling the bag and if you need to refill or get a better grip on the bag.

Ingredients
  • 65g Icing Sugar
  • 65g Almond Flour
  • 45g Castor Sugar
  • 50g Egg white
  • 1/8 teaspoon cream of tartar
  • 2-5 drops of gel colour
Biscuit flavour ingredients:
  • 1.5 to 2.5 teaspoons of rosewater (my favourite) OR
  • 1.5 to 2.5 teaspoons of water & 5 teaspoons of ground ginger OR
  • 1.5 to 2.5 teaspoons of almond oil OR
  • 1.5 to 2.5 teaspoons of vanilla extract OR
  • any combination which lets you add 1.5 to 2.5 teaspoons of fluid and doesn’t have too much powdered flavour.
Method
  1. After preparing your bowls and utensils, sift the icing sugar and almond flour into a bowl.
  2. Place the egg whites in a large mixing bowl, and using an electric mixer, whisk on high for less than a minute until they form big and foamy bubbles.
  3. Keep beating and very slowly add the castor sugar, sprinkling over the top.
  4. Once the sugar is incorporated (and before you get stiff peaks in the whites), add in the cream of tartar and your gel colour. Keep beating until you get stiff peaks. You should be able to hold the bowl upside down without the egg whites coming out when they are stiff (don’t try it unless you are sure!).
  5. Fold in half the dry mixture about a tablespoon at a time by sprinkling over the top and using a bowl scraper to fold over the mixture. Knowing when to stop is what you need to know here.
  6. Before you fold in the last of your dry mixture, fold in 4 teaspoons of your fluid (and add any dry flavour/spice at this time) – keep the fifth teaspoon in reserve.
  7. Fold in the rest of the dry mixture.
  • NOTE: if the mixture looks too dry (it should be a bit like rubbery putty, often referred to as lava) then add the fifth teaspoon of fluid and fold in. It should look fully incorporated and not be able to completely hold its shape.
  1. Put batter into the piping bag – filling it half way. If you overfill, it will spill out the top when you squeeze it.
  2. Lift each of the four corners of the baking paper and put a small blob of mixture down, this will hold the paper down.
  3. Carefully pipe onto the baking trays so that the mixture stays within the bounds of the circles.
  4. Once all circles are piped, you will have some irregularities on the surface of the biscuits and bubbles inside them from piping. Slam the baking tray on the surface several times, you can be quite vigorous, then turn the tray around and do the other side. The tops of the biscuits should flatten out. This will help make them look nice and stop them popping while baking.
  5. Pipe the rest of the mixture onto the other baking trays and follow the same instructions.
  6. Put all trays out of the reach of little paws and fingers for an hour (this allows the tops to dry and gives the biscuits their trademark shine).
  7. Preheat the oven to 140 degrees Celsius.
  8. Bake one tray at a time in the middle of the oven for 10 minutes each. Do not be tempted to open the oven while baking.
  9. Leave on the tray to cool.
Picture
Piped and after they have been de-bubbled
Picture
After baking - resist the urge to touch before cool
Assembly
  1. Partially melt your ganache (until it is slurry, not liquid) when you pipe it on the biscuits. If using something else, make sure you can pipe it.
  2. Place filling in piping bag.
  3. Make sure your hands are very clean and dry.
  4. Pipe a blob onto one biscuit and put another half on top and gently press so the filling just reaches the edges of the biscuits.
  5. Place biscuits in a container and refrigerate for at least 2 hours (although 24 hours is better). 
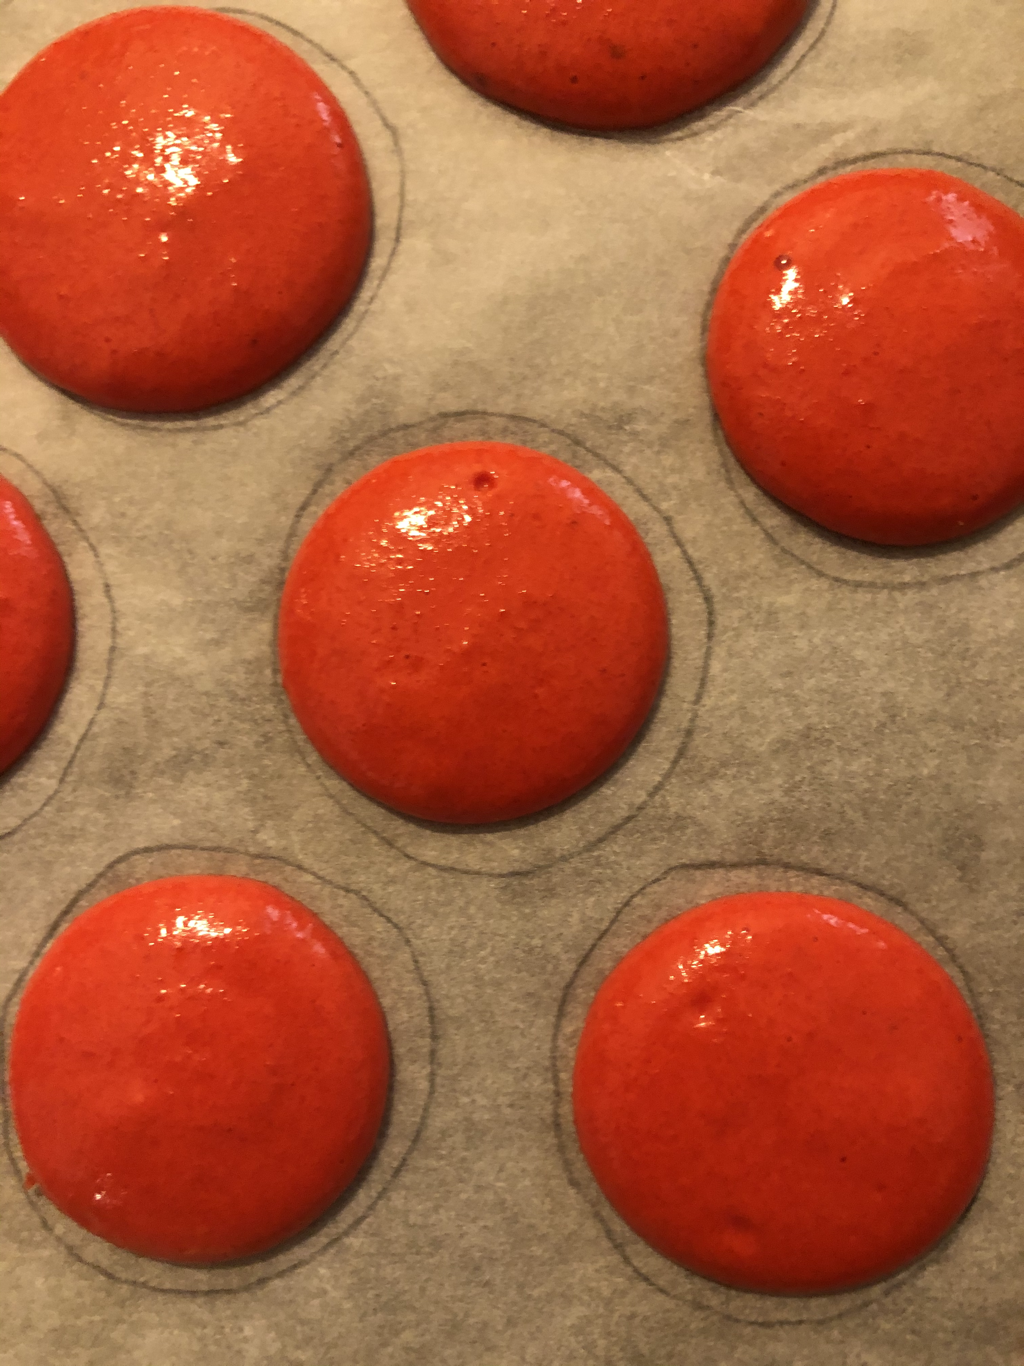
Diagnose your problems
This is batter that was not folded enough, did not have enough fluid and was baked too long.
Picture
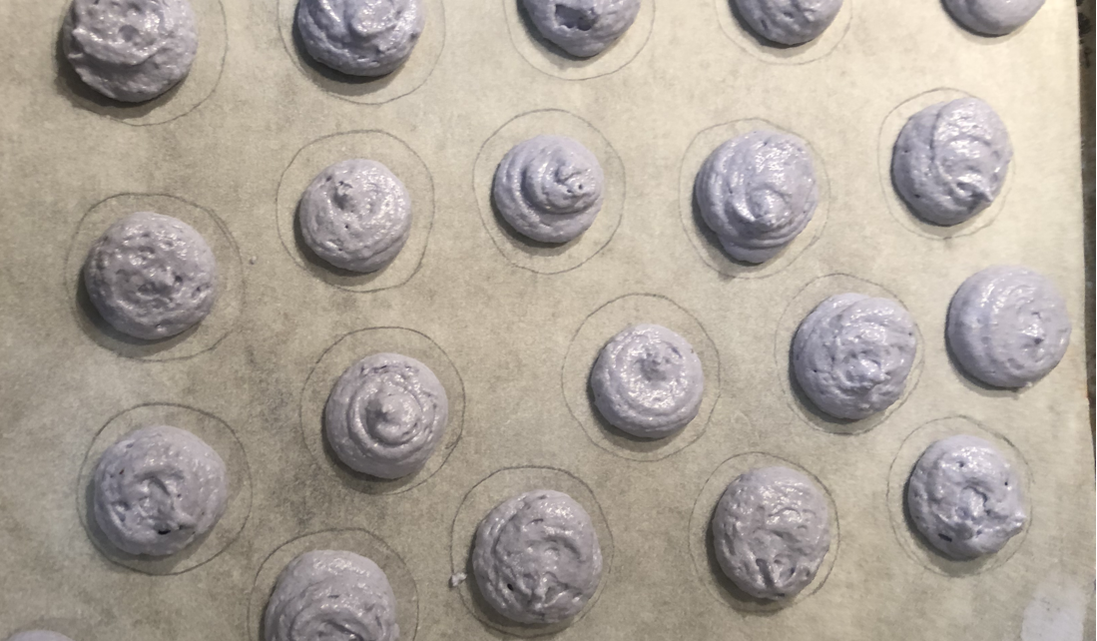
The bumpiness on top and lack of gloss, show these were not folded enough. They were also baked at 10 degrees too hot and 2 minutes too long. ​They were still pretty good though. 
Picture
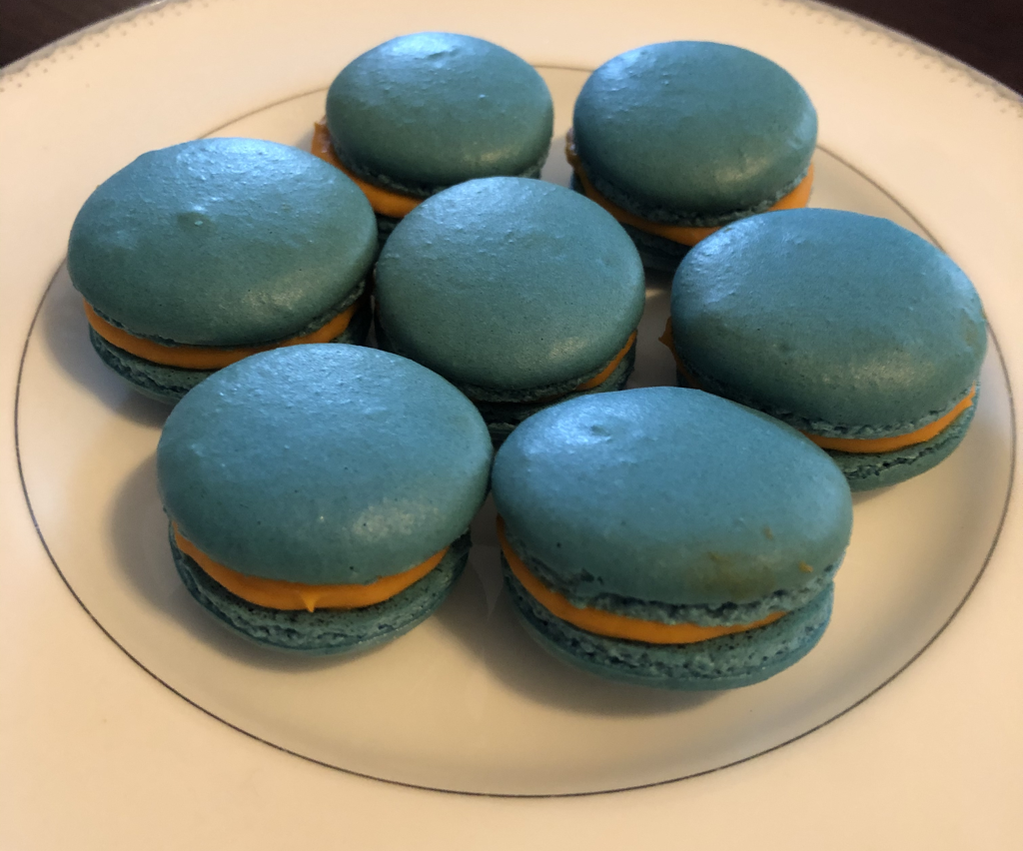
​Just remember to keep a record of everything and you will be able to solve your problems quickly and start turning out top quality macarons in no time.
0 Comments

Your comment will be posted after it is approved.


Leave a Reply.

    Dr. Nicola Boyd

    I am trying to teach myself to be a medieval and renaissance confectioner. This has led to an interest in modern deserts too. 
    Some of these articles are written as Lady Nicola de Coventre for my re-enactment group Society for Creative Anachronism (SCA).

     Articles
    • Almond Macaroons
    • Cherry Jam
    • ​Crème Brûlée
    • ​Excellent Small Cakes
    • French Macarons
    • ​Jelly: Almond milk and port
    • ​Jumballs 
    • Lemon Butter
    • Lemon Syrup 
    • ​Marchpane (16th Century Marzipan)
    • ​Pumpkin Soup
    • Subtleties
    • Sugar Plate ​
Powered by Create your own unique website with customizable templates.